Note: These instructions are for the 2021 Azure portal.
Overview:
To setup or manage an existing integration navigate to the main settings page by selecting the cog in the top navigation bar, then select "Manage" in the Azure AD Sync panel.
![]()

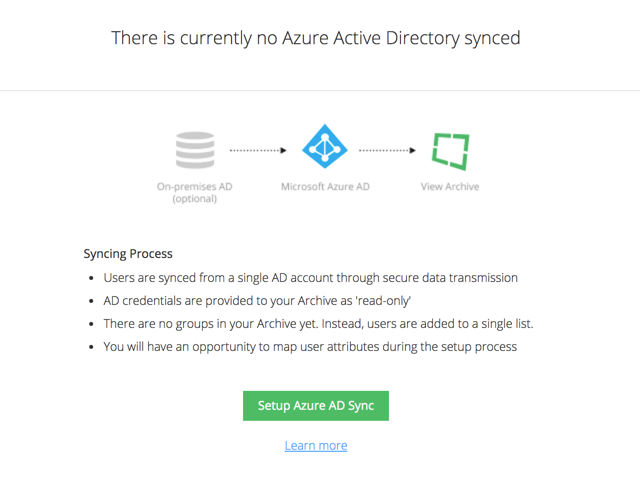
- If there is an existing connection, you will need to 'Delete Sync' before moving to the next step

- The next 1-5 steps will continue from the Azure admin portal
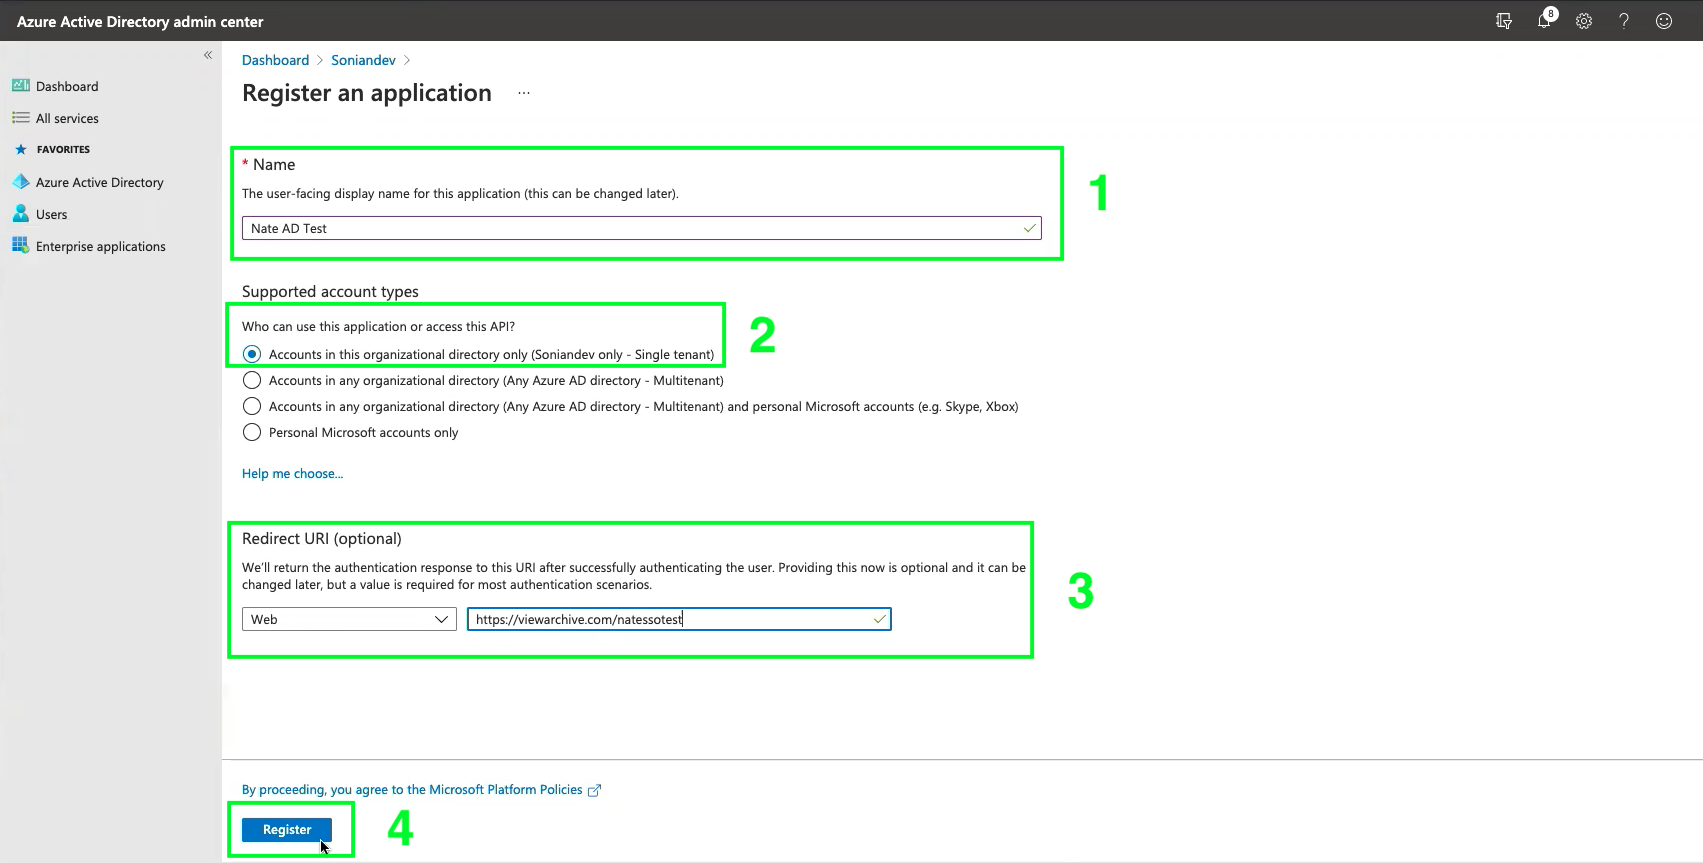
1. Register application under Dashboard > *instance_name* > App registration
1-1 Add name
1-2 Supported account types = Single tenet
1-3 Redirect URL = Web – View archive URL
1-4 Select - 'Register'
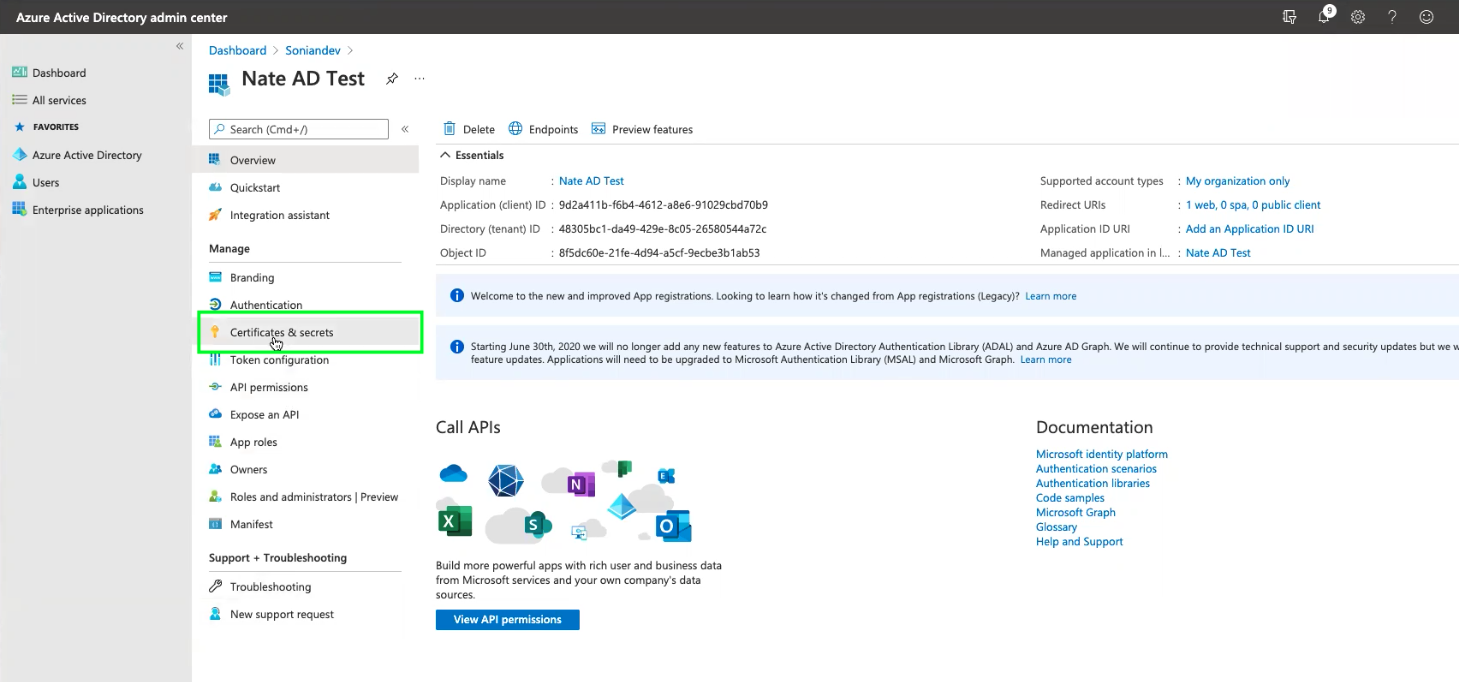
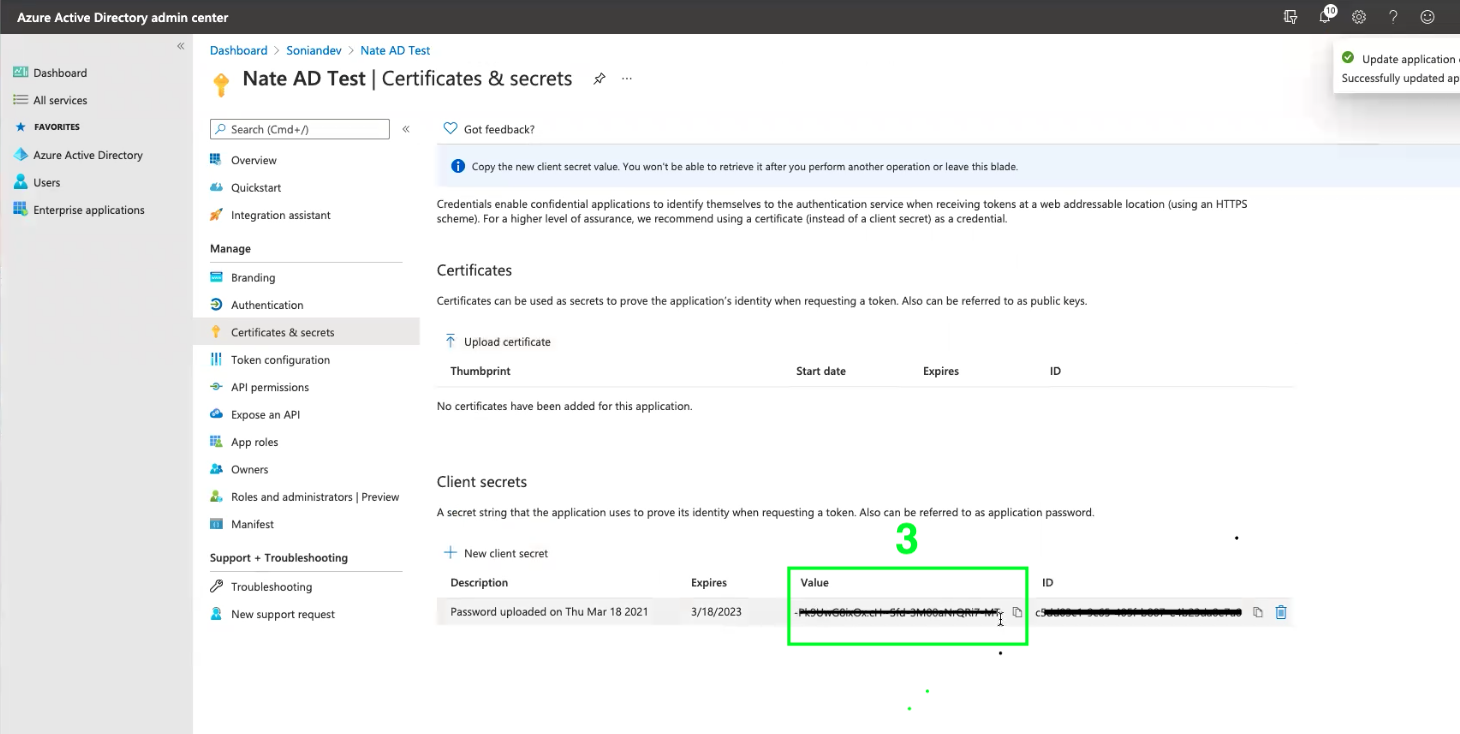
2. Select – 'Certificate & secrets'
2-1 Select – '+ New client secret'
2-2 Expires = 2 years > Select 'add'
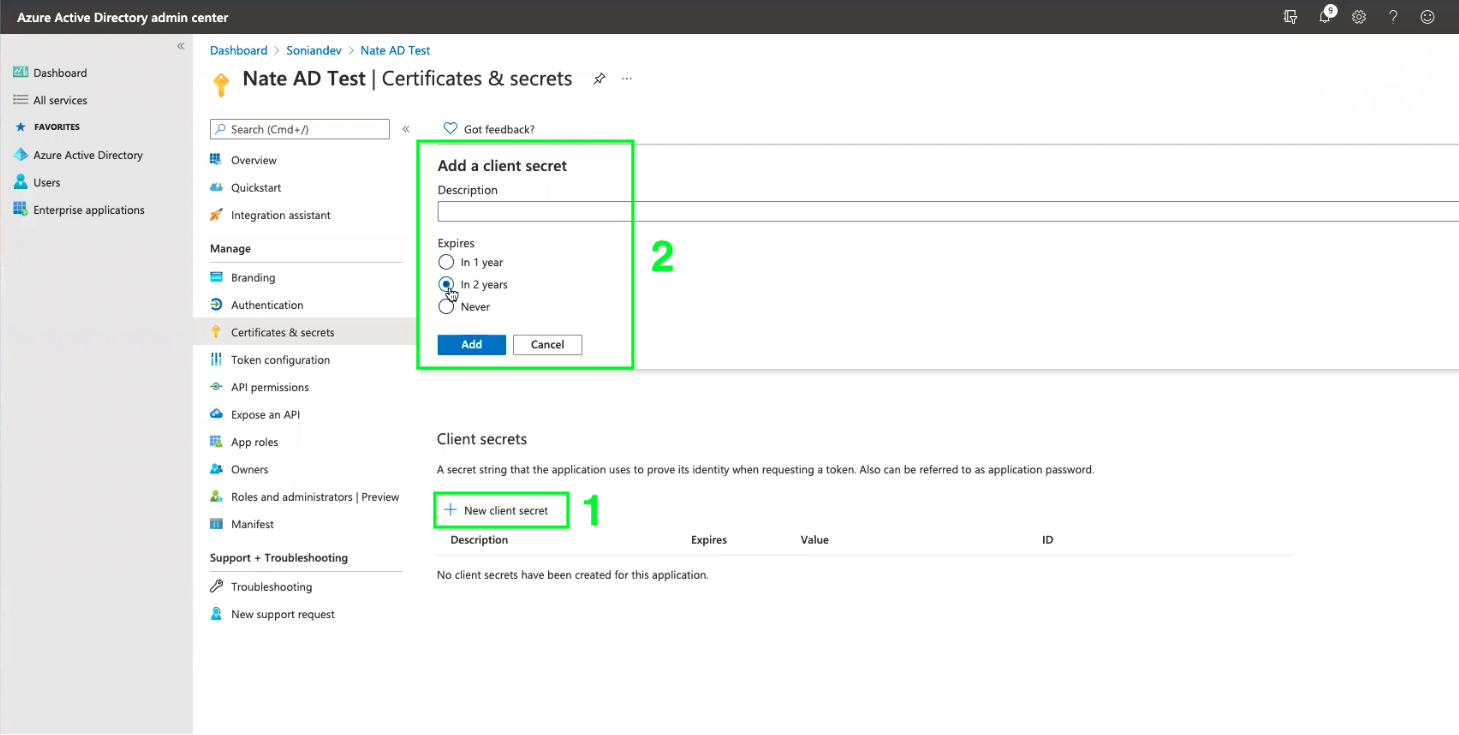
2-3 Key has now been generated in the Key field. Copy and store the key value.
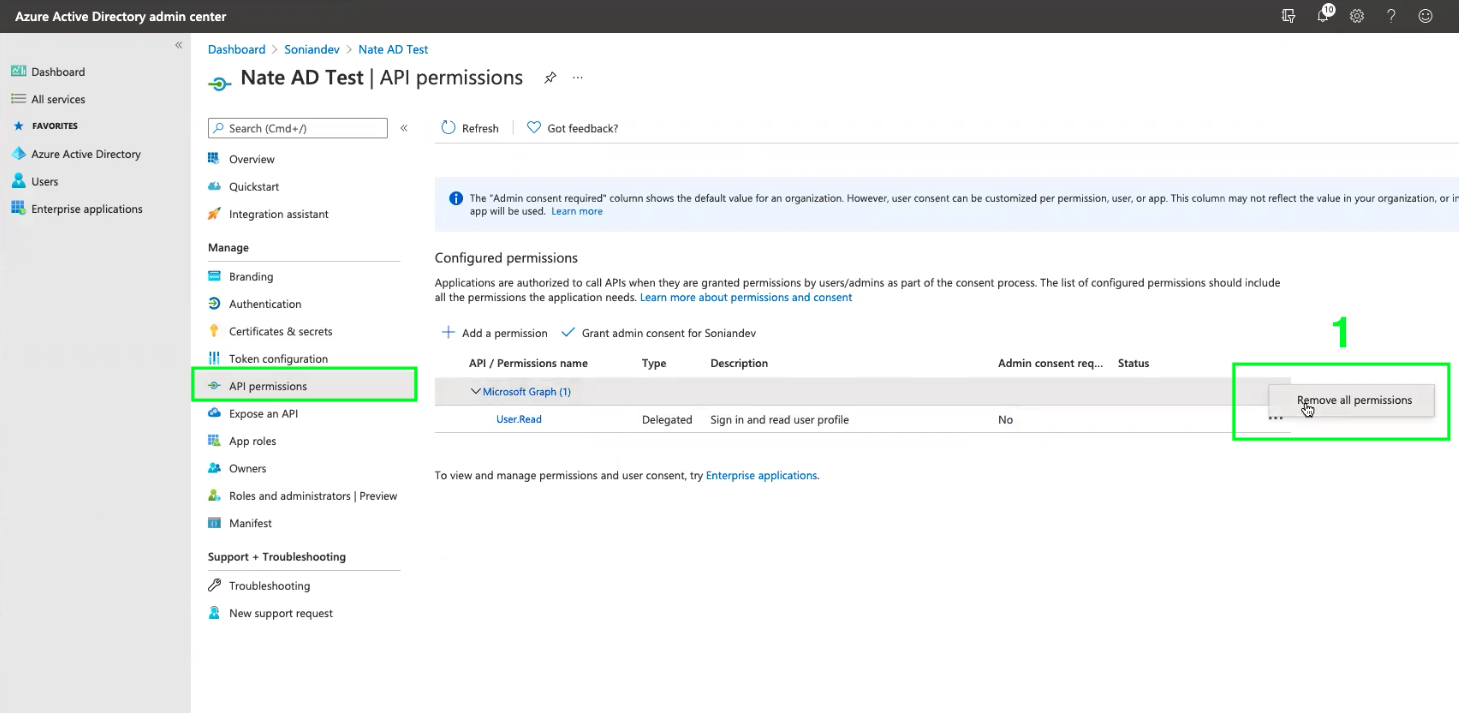
3.Select – ‘API permissions’
3-1 Select – 'Microsoft Graph (1)' > 'Remove all permissions'
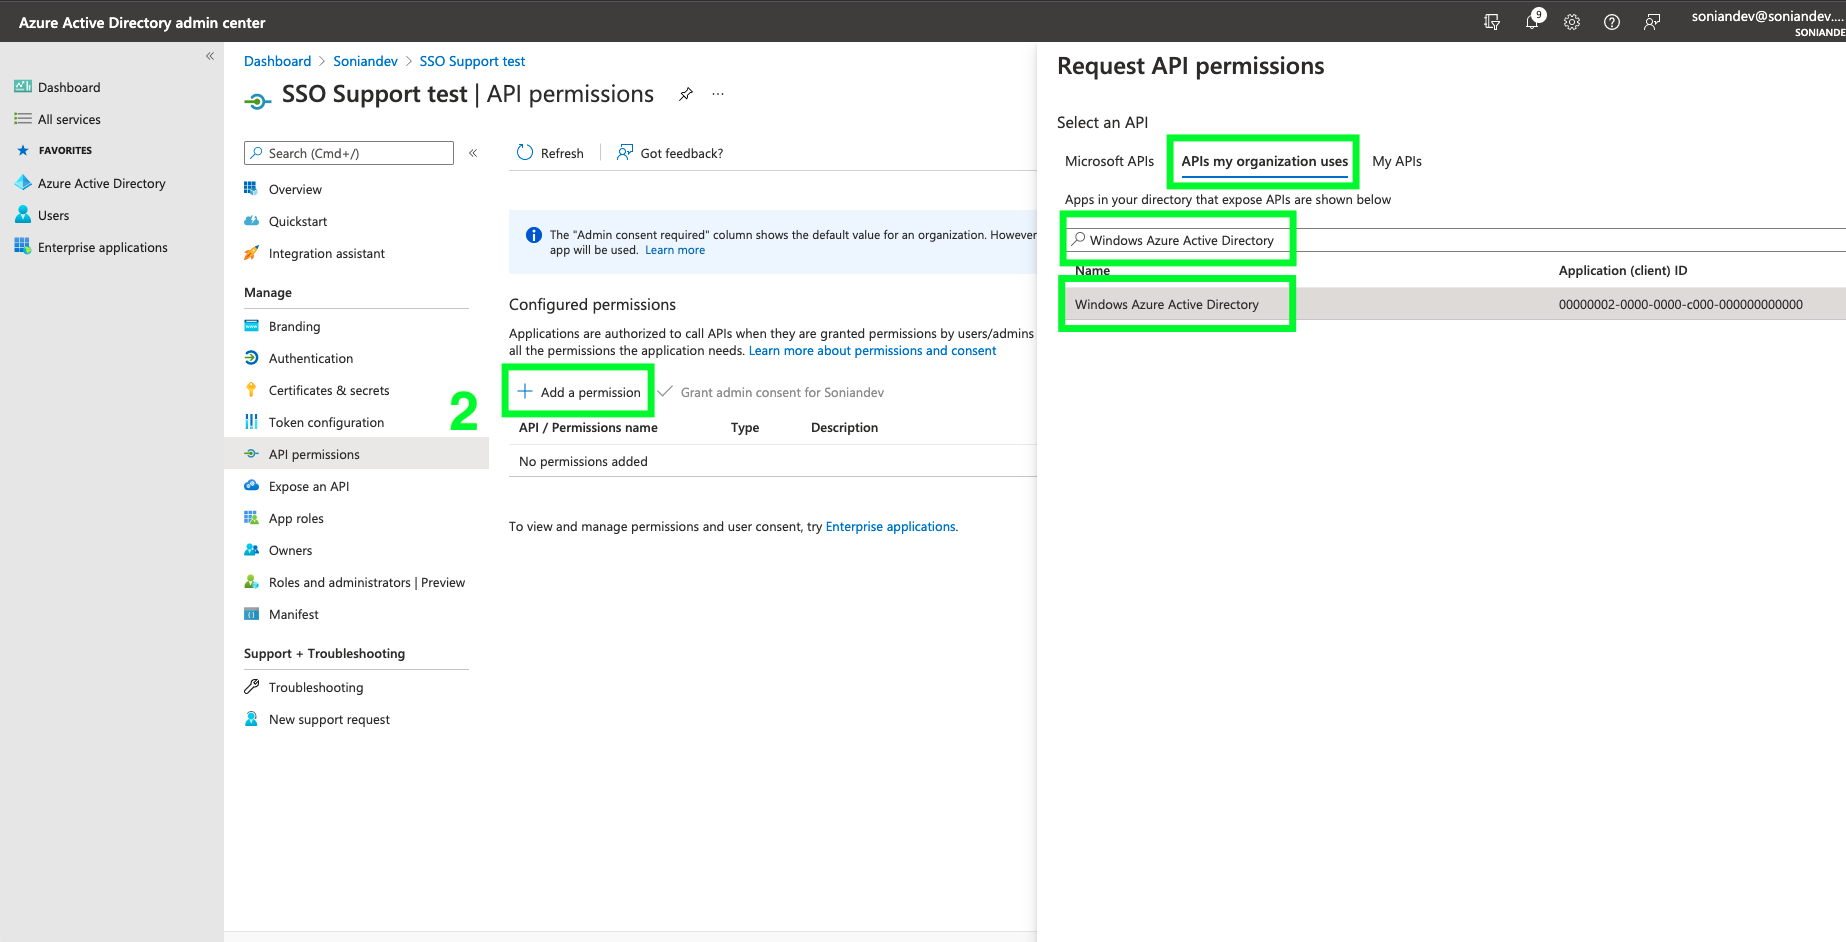
3-2 Select – '+ Add a permission' > 'APIs my organization uses'> Search for "Windows Azure Active Directory" > Select "Windows Azure Active Directory"
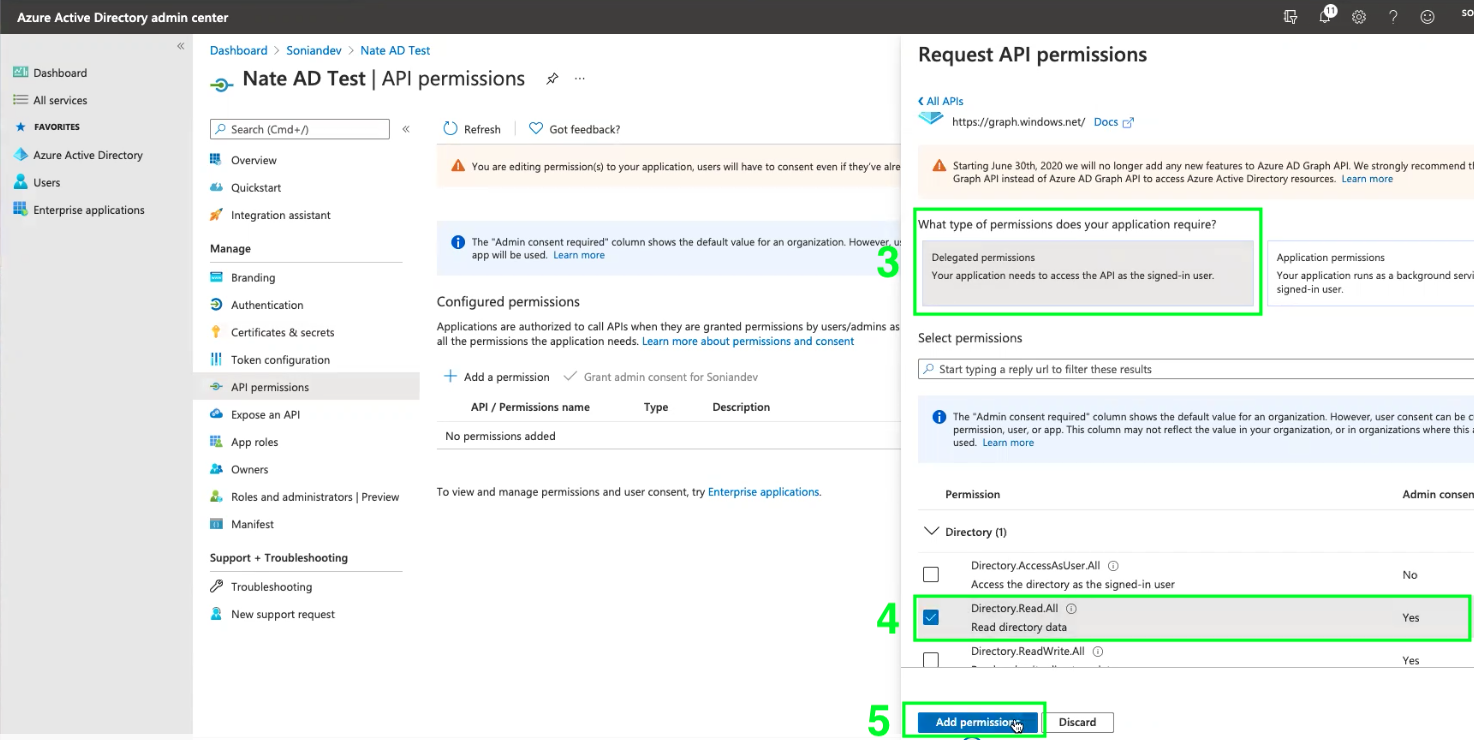
3-3 Select 'Delegated permissions'
3-4 Select 'Directory.Read.All'
3-5 Select 'Add permission'
3-6 – Repeat step 3-2
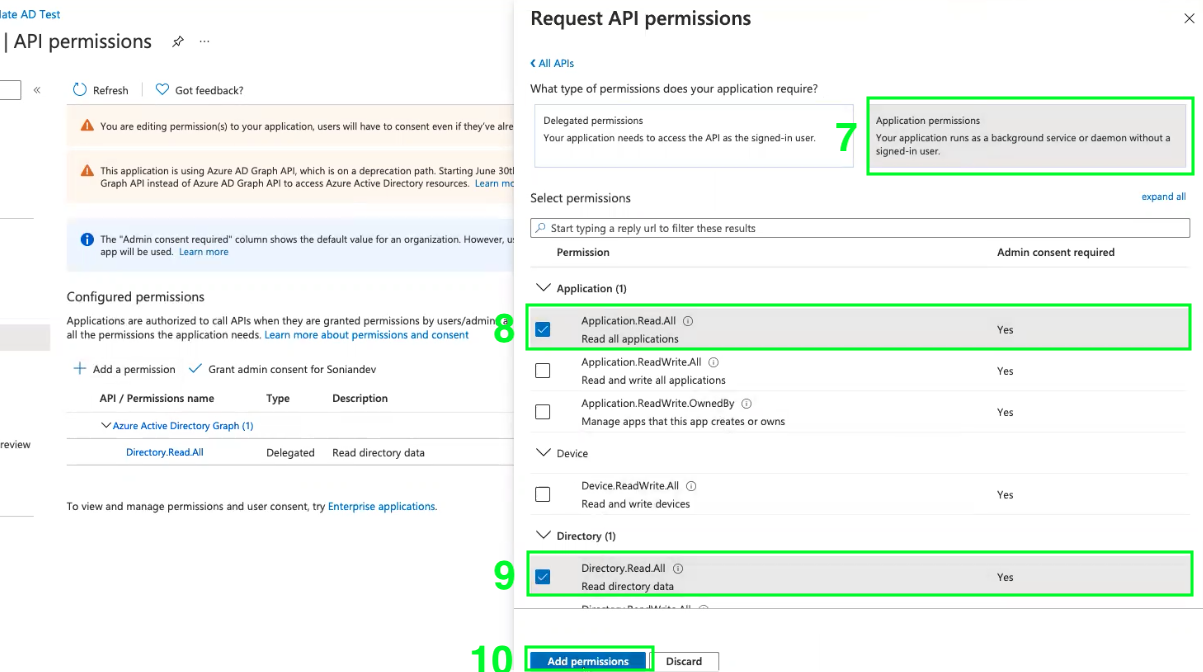
3-7 Select 'Application permissions'
3-8 Select 'Application.Read.All'
3-9 Select 'Directory.Read.All'
3-10 Select 'Add permissions'
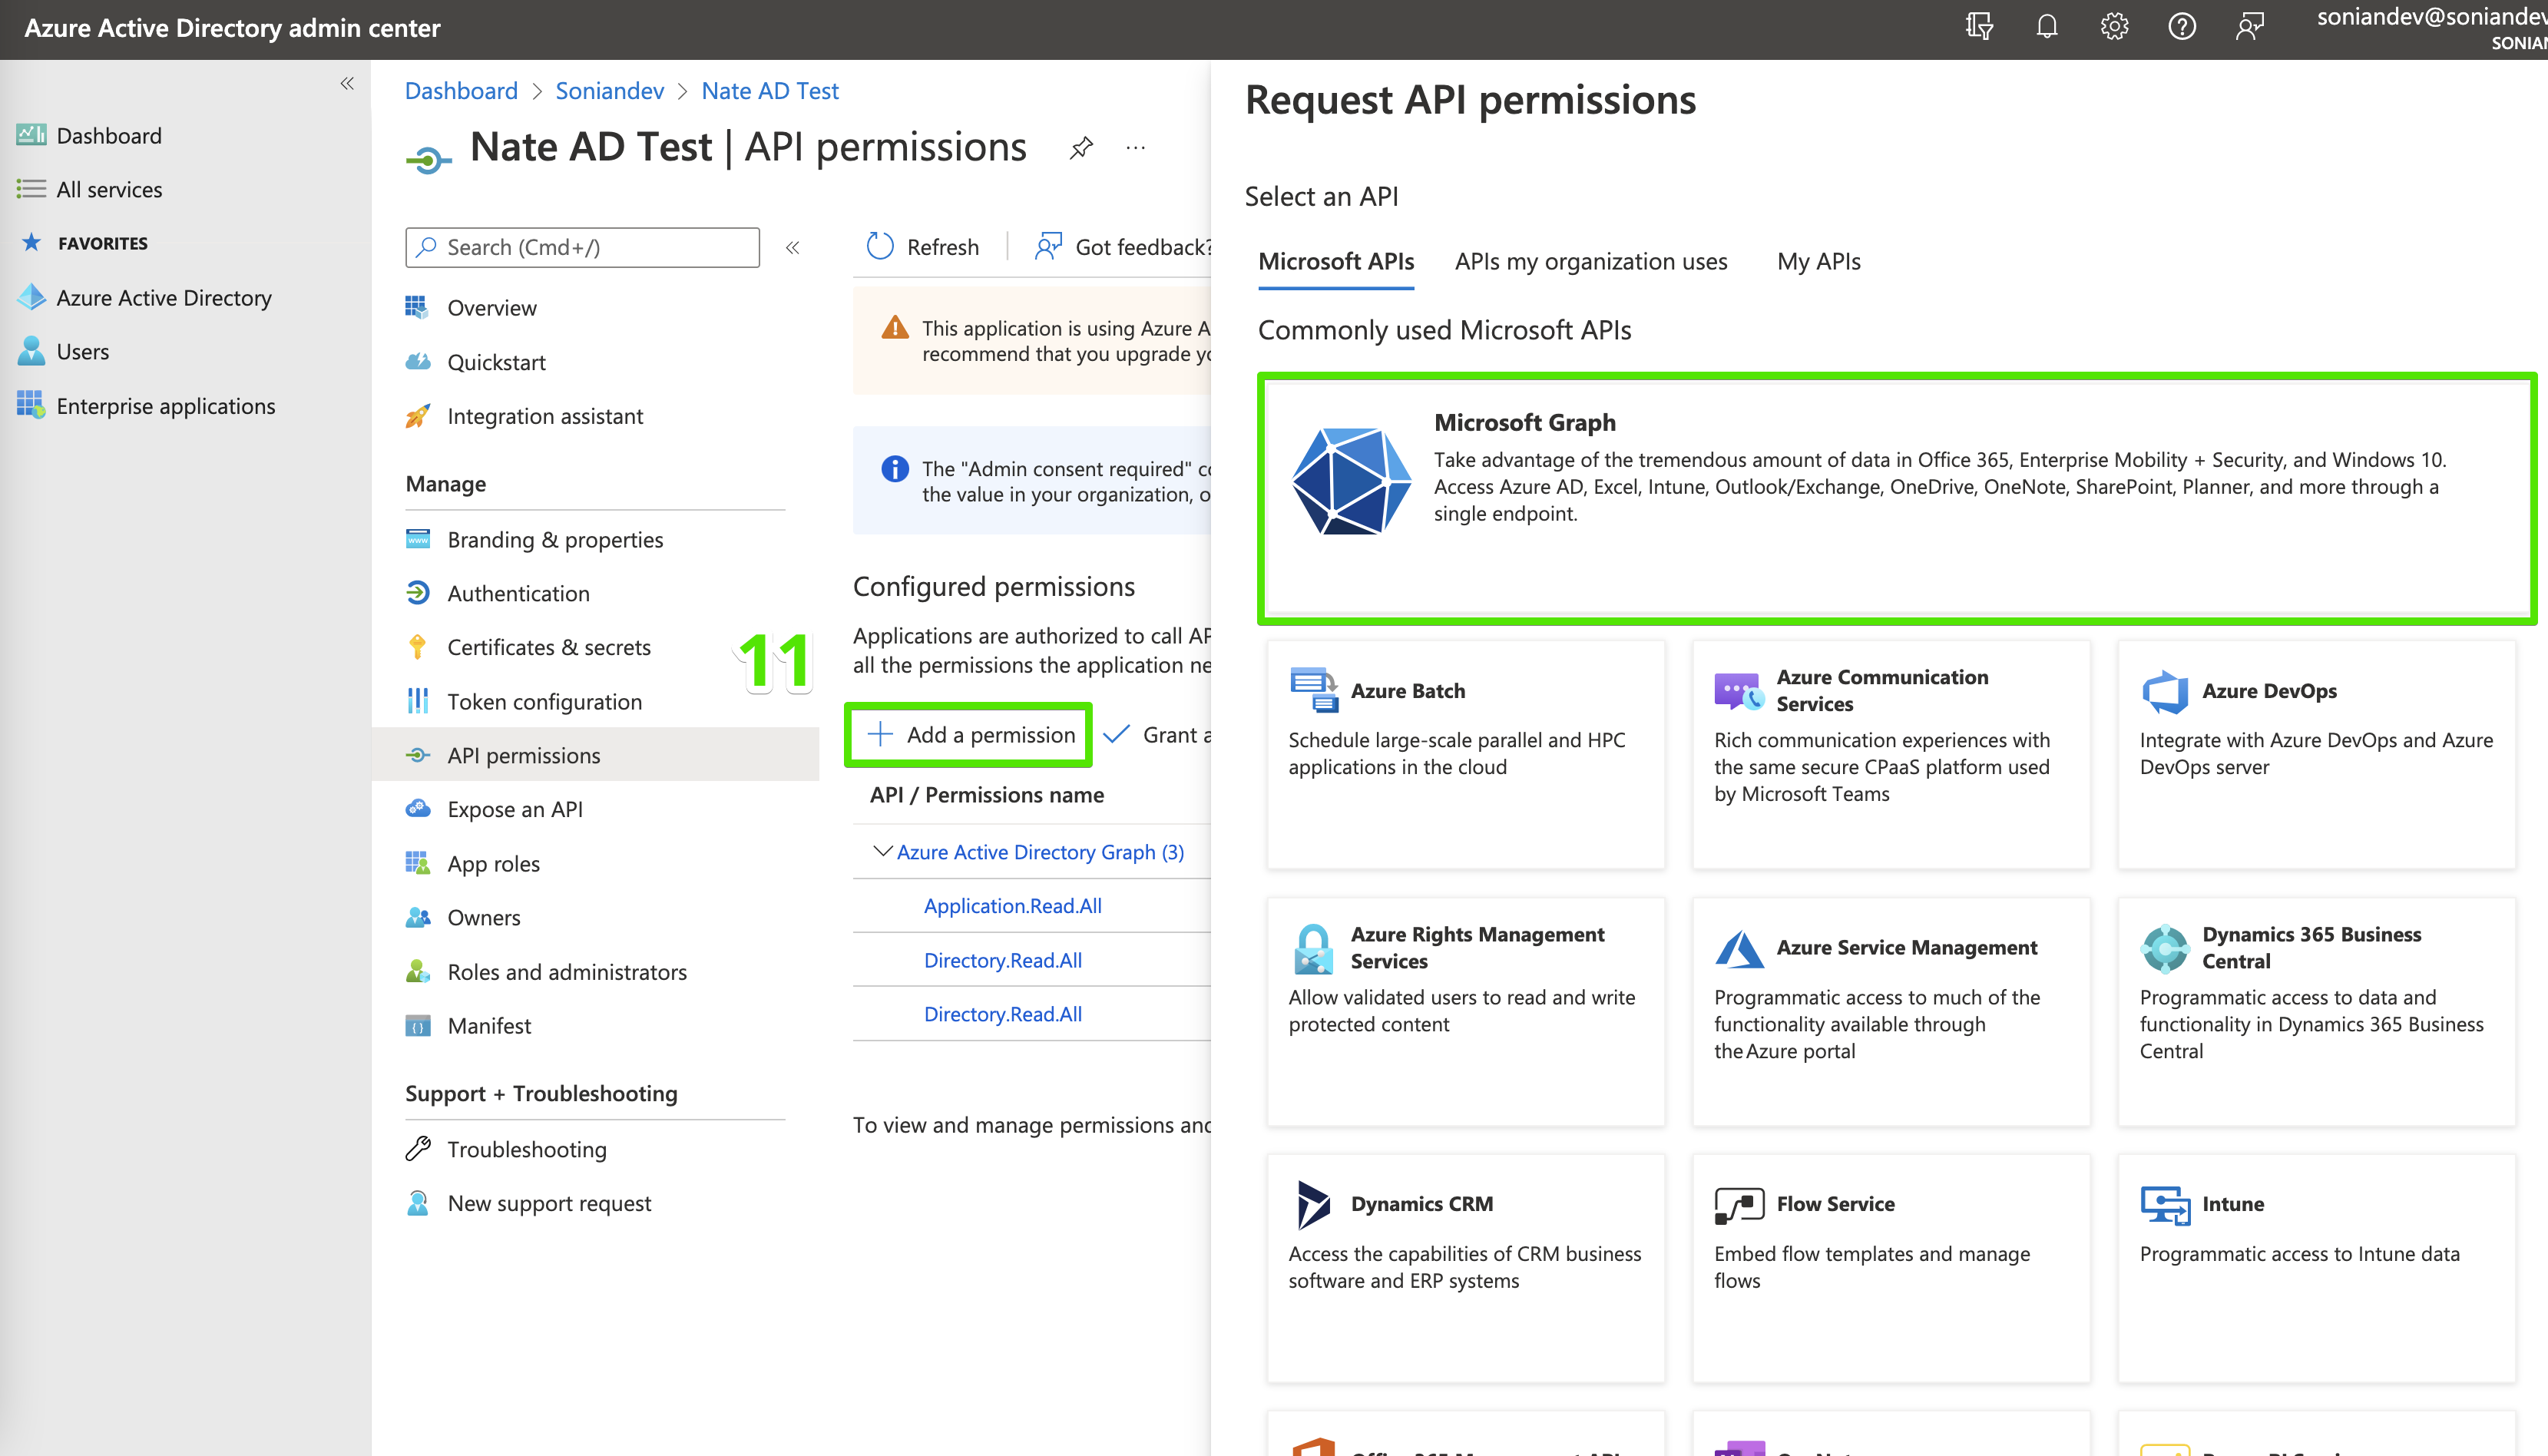
3-11 Select – '+ Add a permission' > 'Microsoft Graph'
3-12 Select 'Delegated permissions'
3-13 Select 'Directory.Read.All'
3-14 Select 'Add permission'

3-15 – Repeat step 3-11
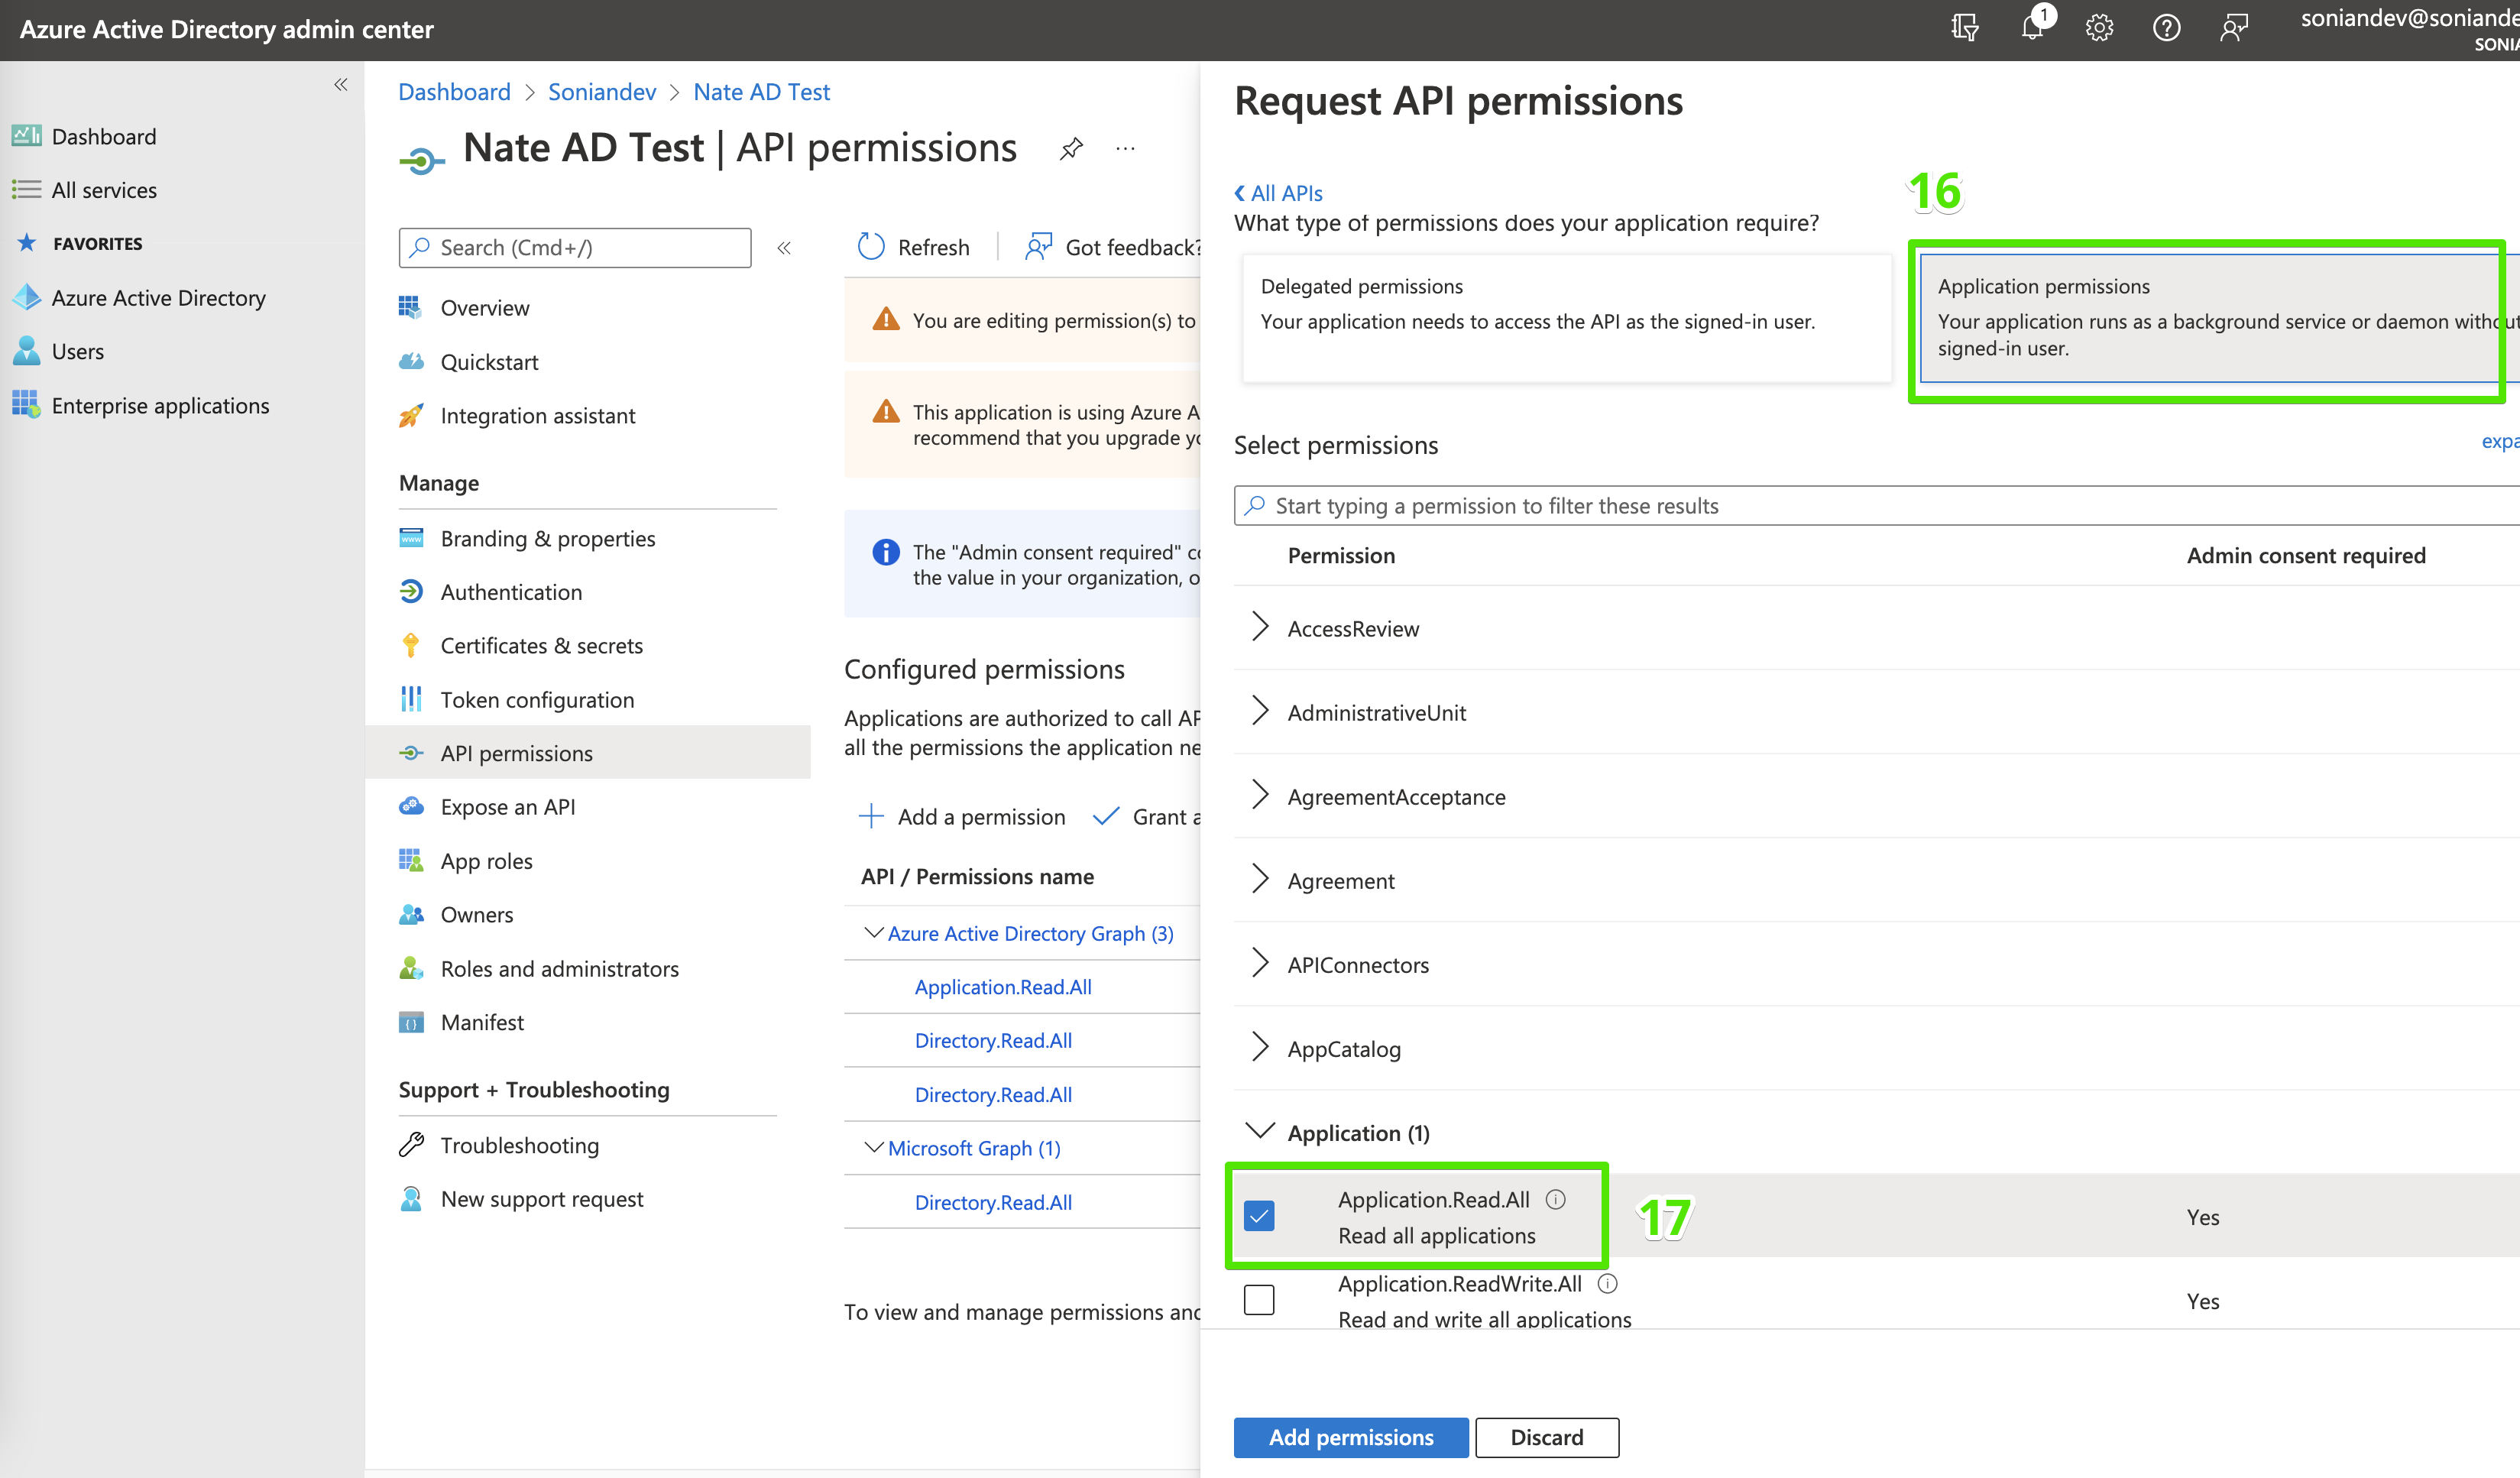
3-16 Select 'Application permissions'
3-17 Select 'Application.Read.All'
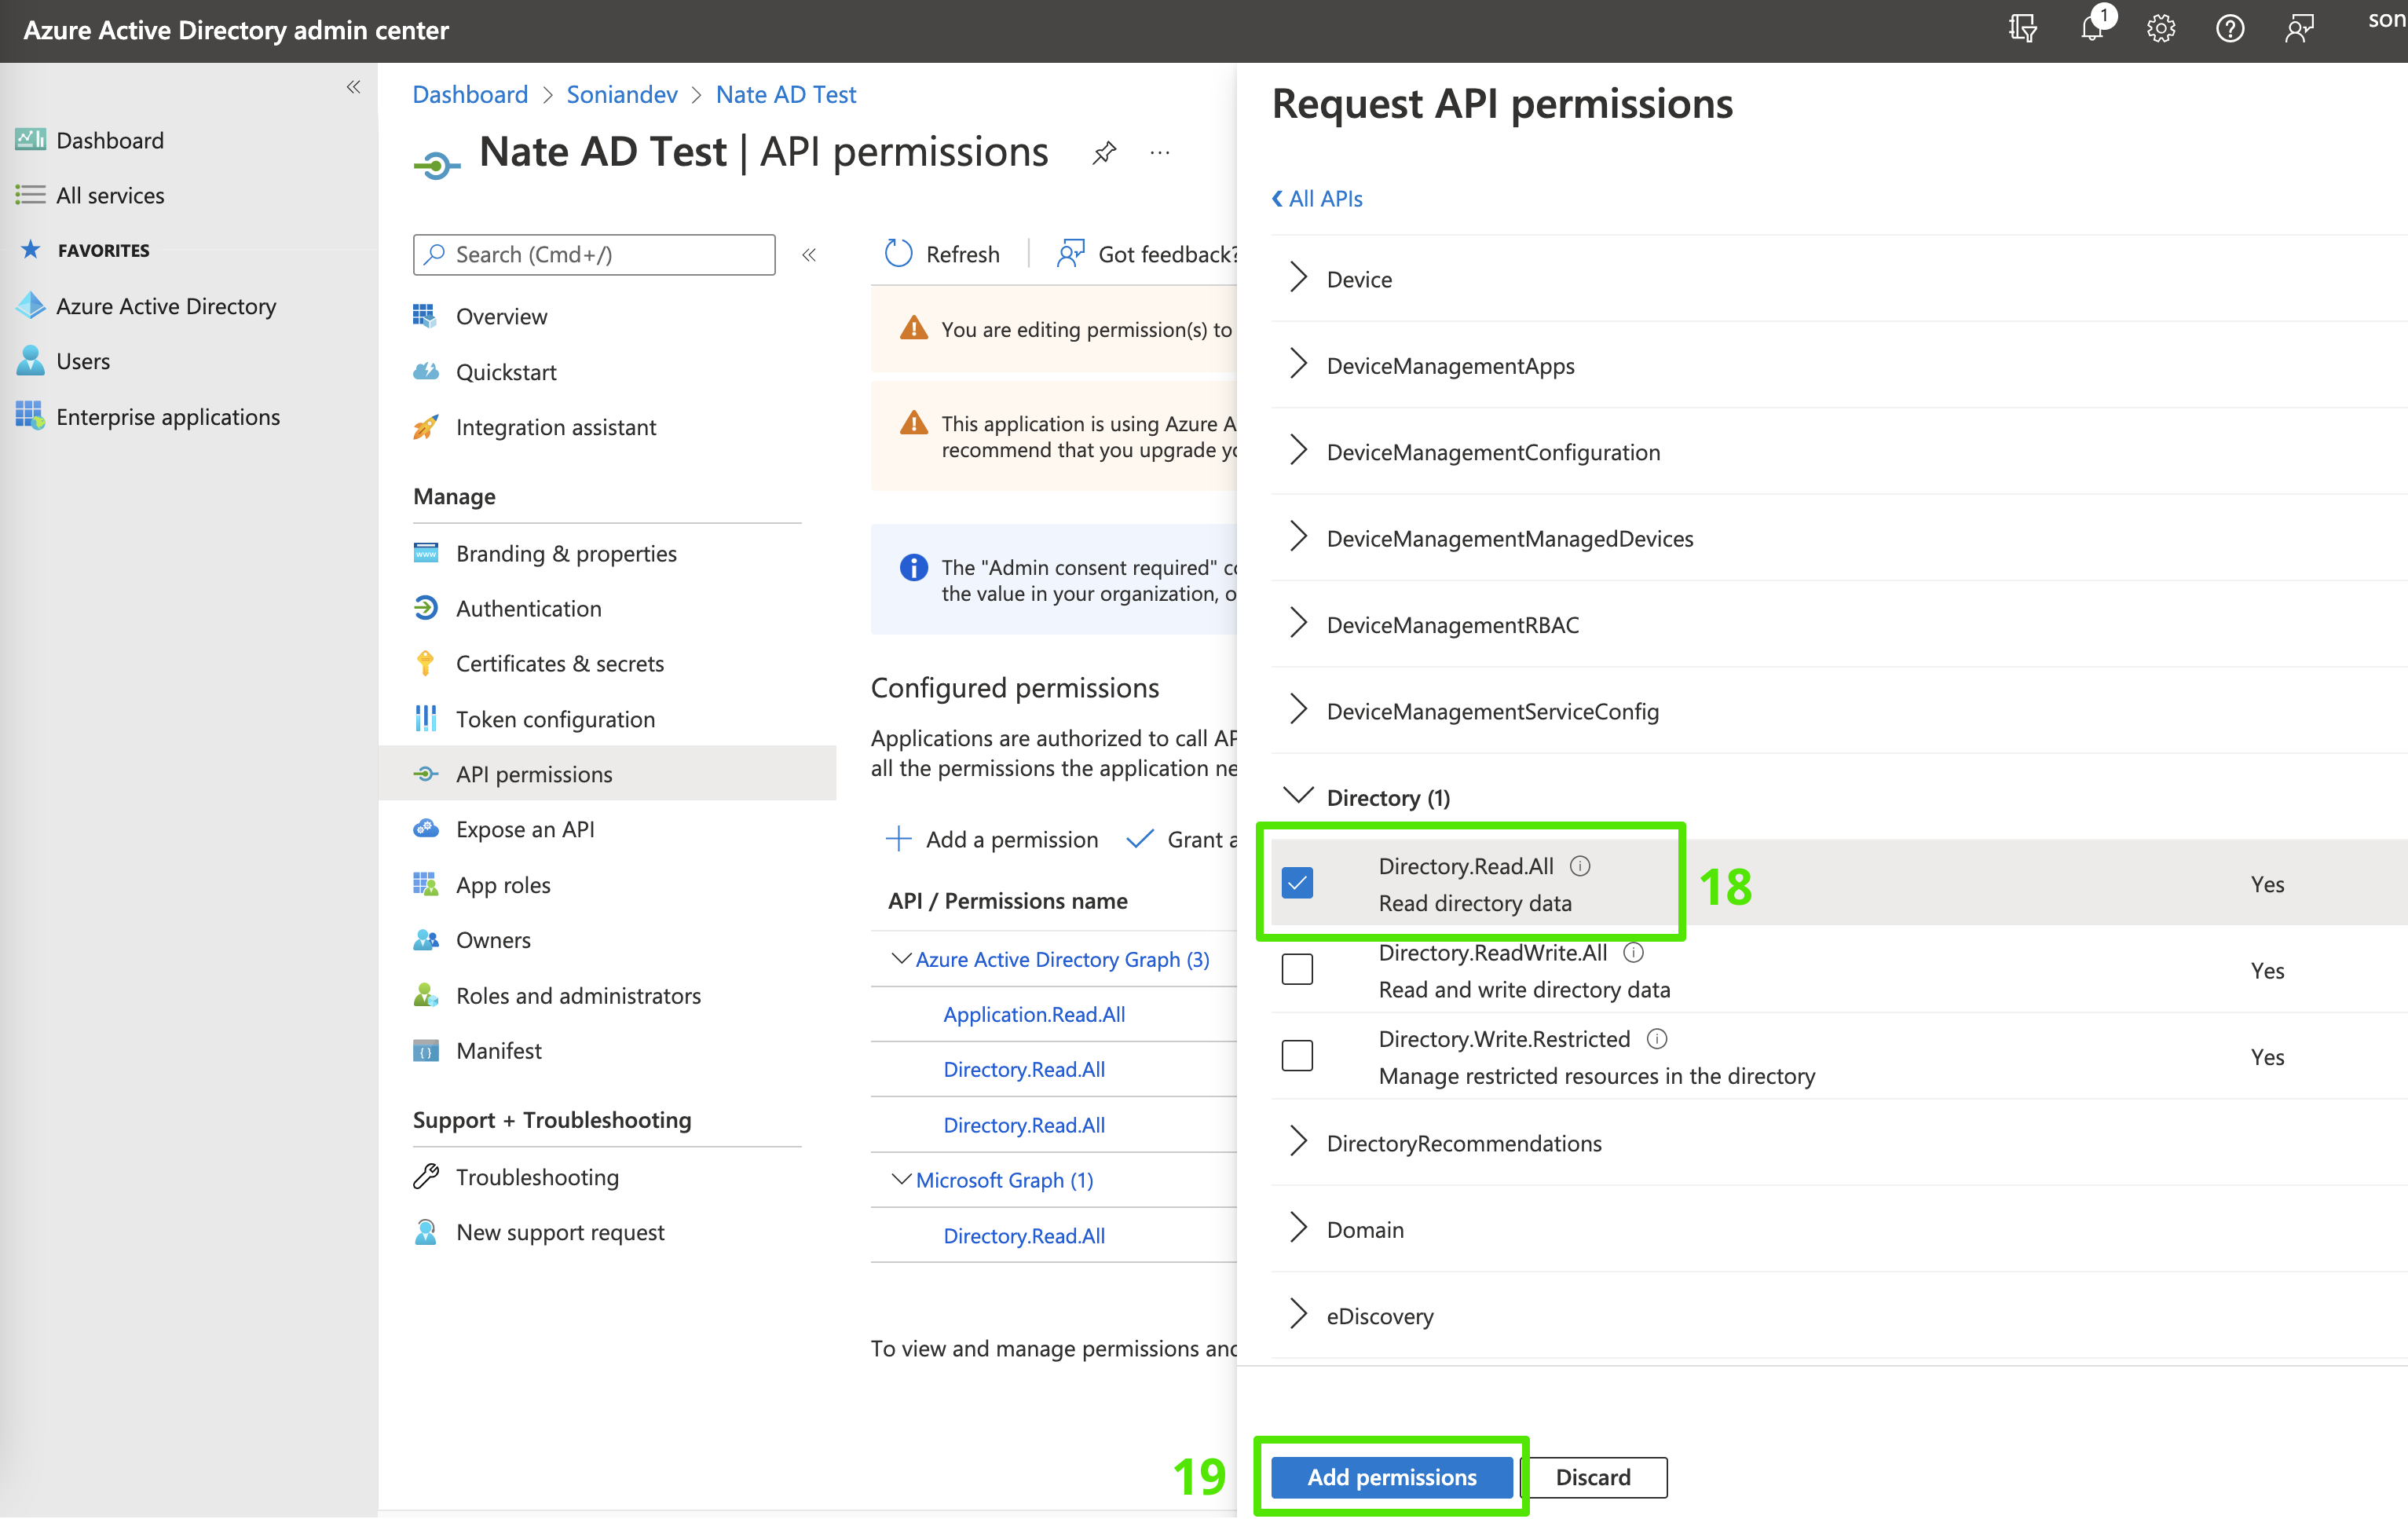
3-18 Select 'Directory.Read.All'
3-19 Select 'Add permissions'
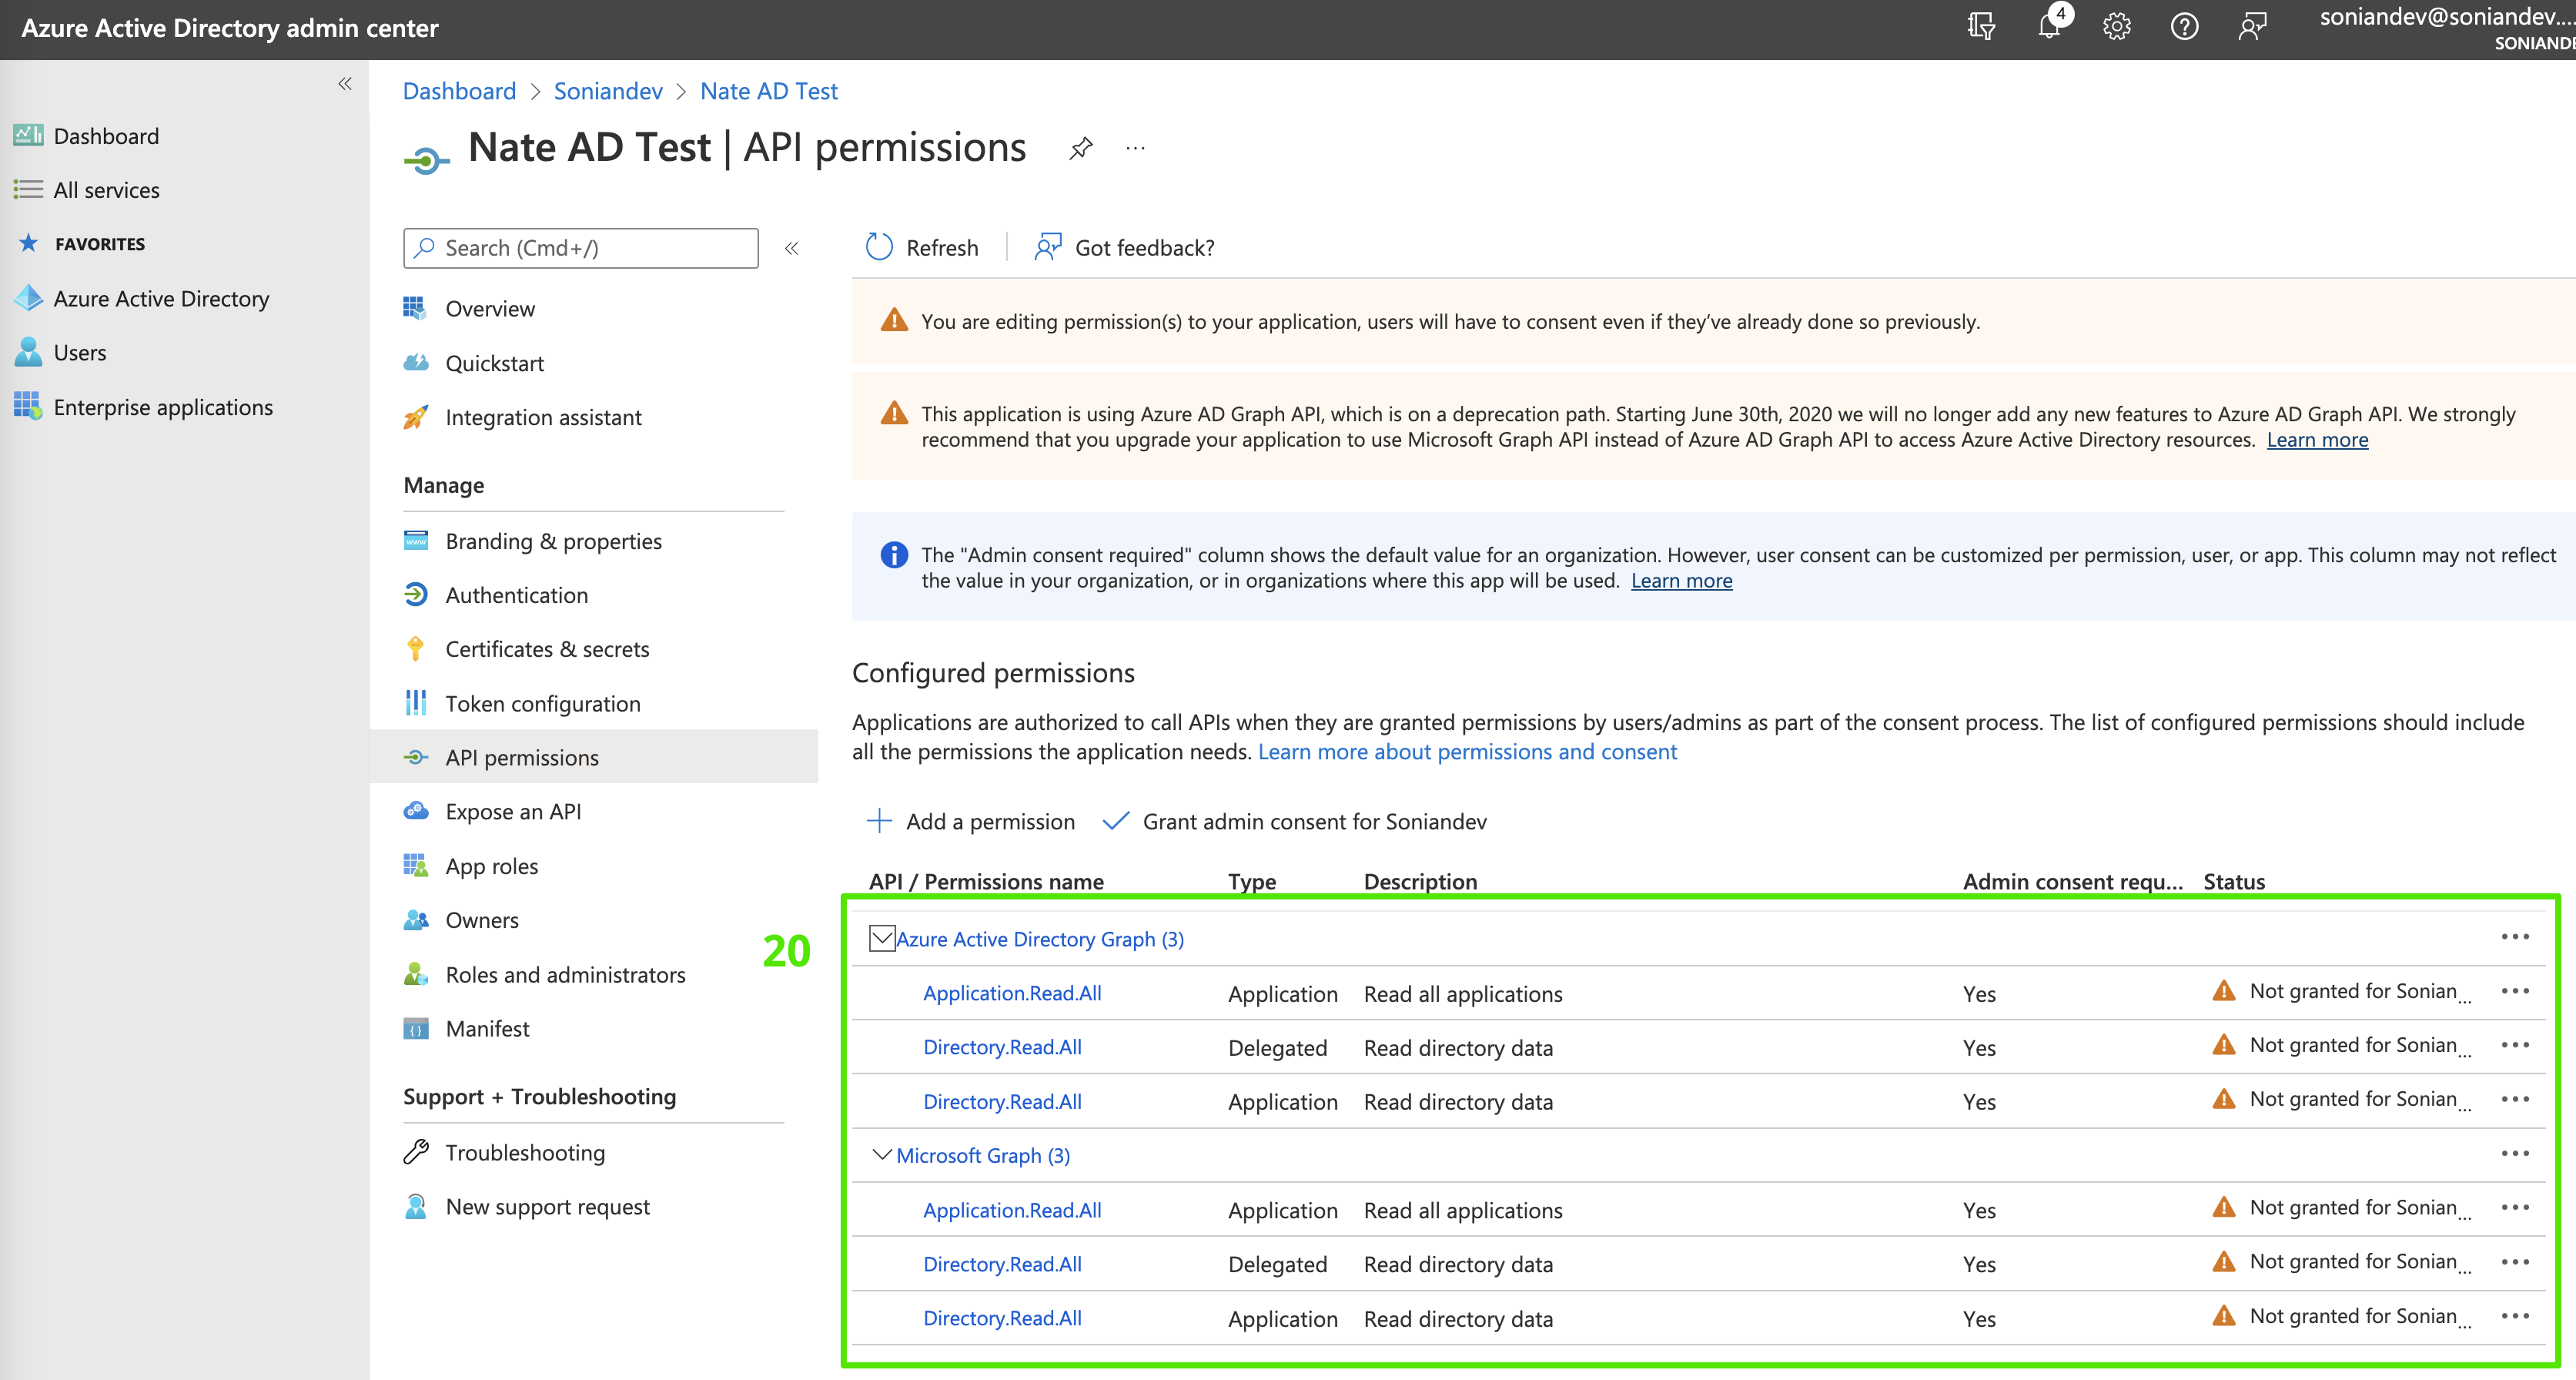
3-20 Configured permissions should look like this:
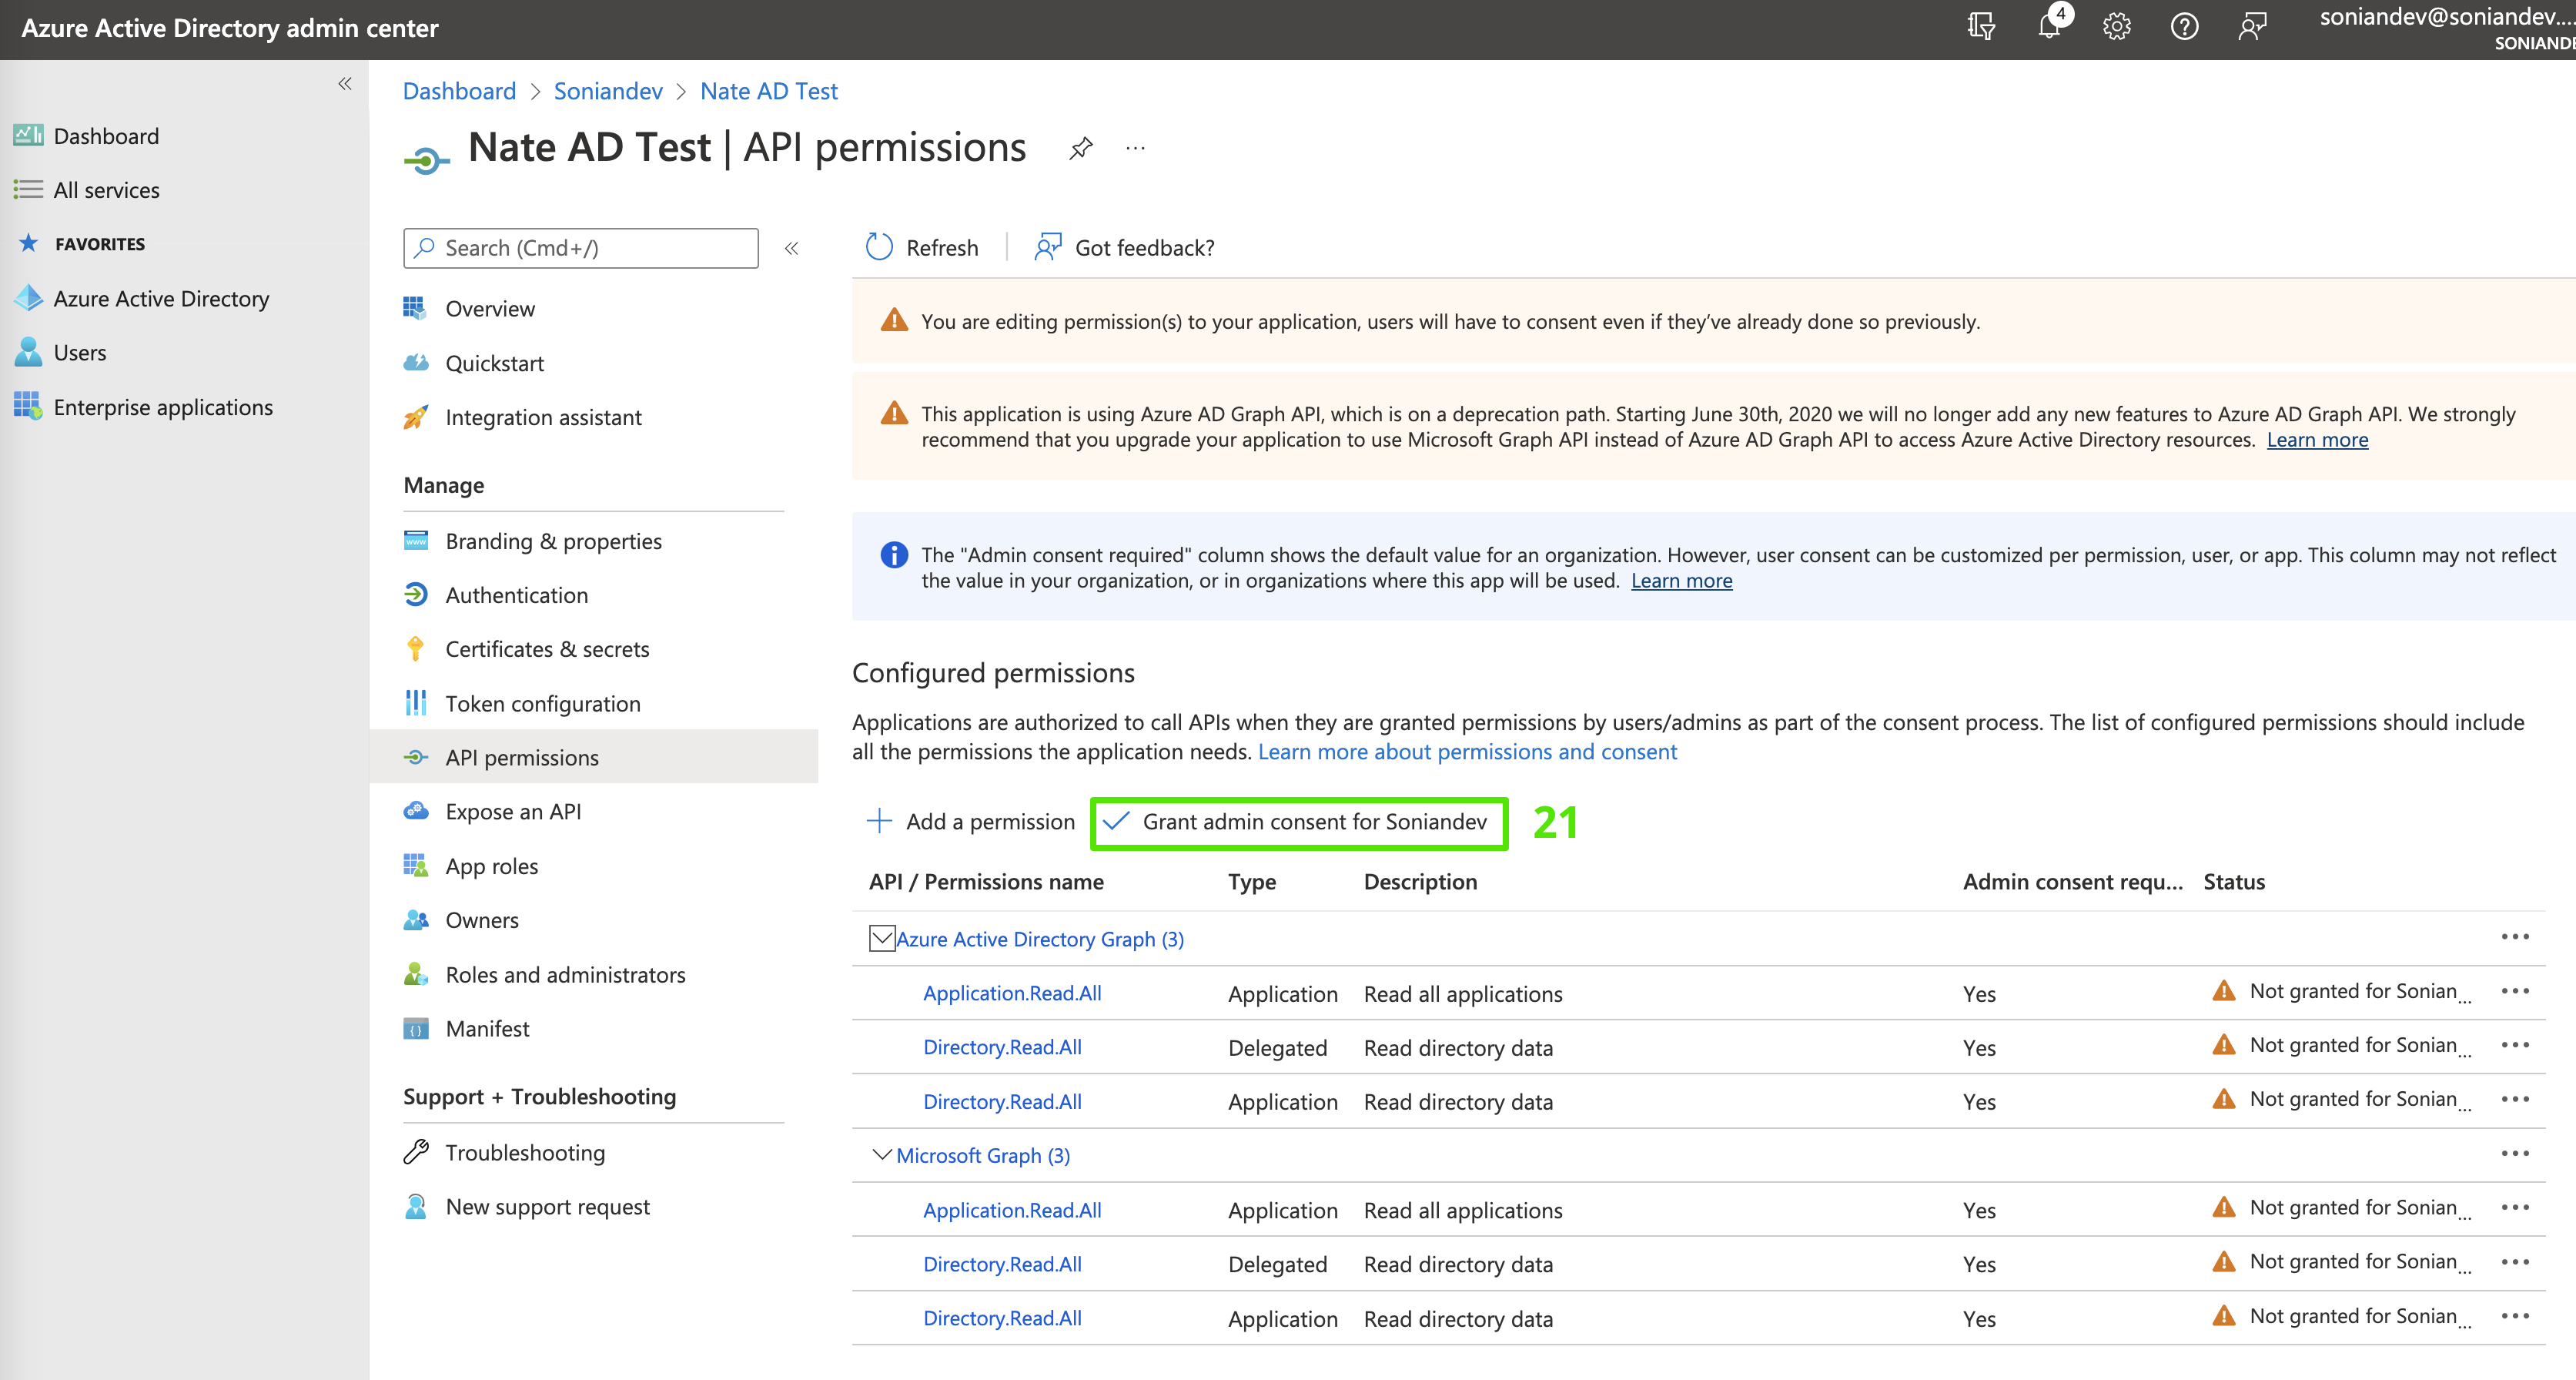
3-21 Next select 'Grant admin consent for *instance_name*'
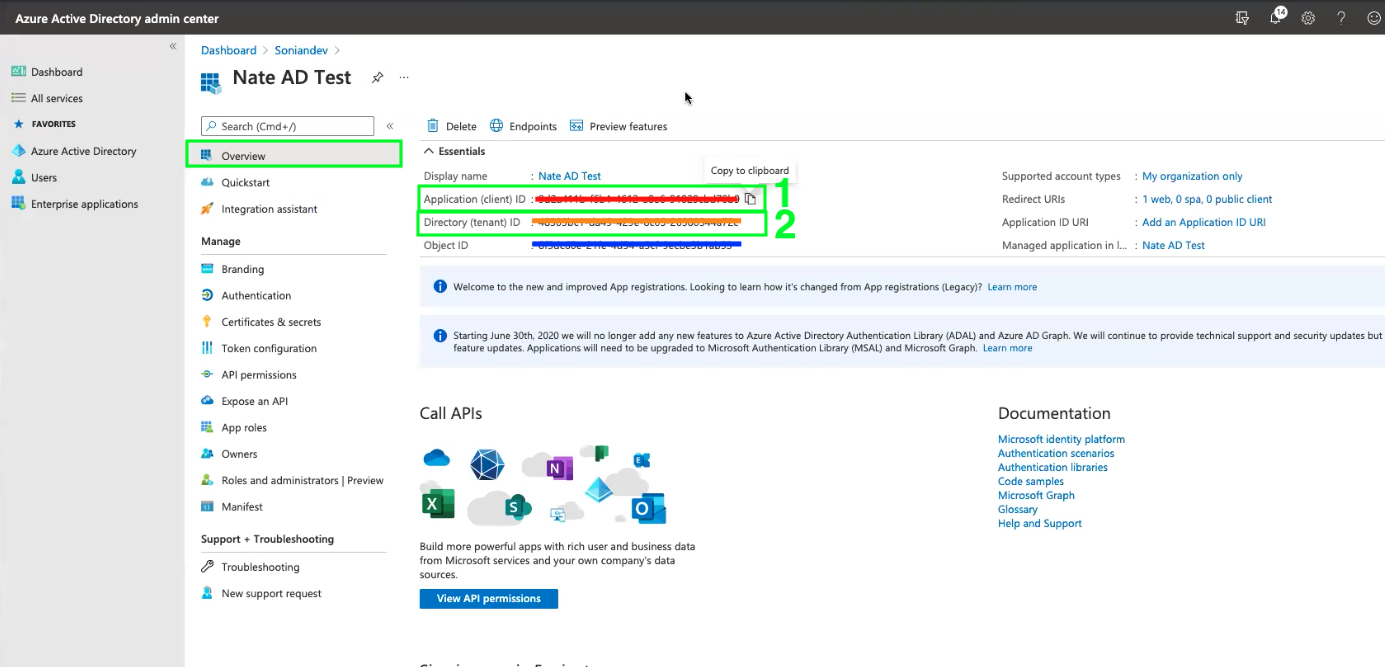
4. Select 'Overview'
4-1 copy client ID
4-2 copy tenet ID
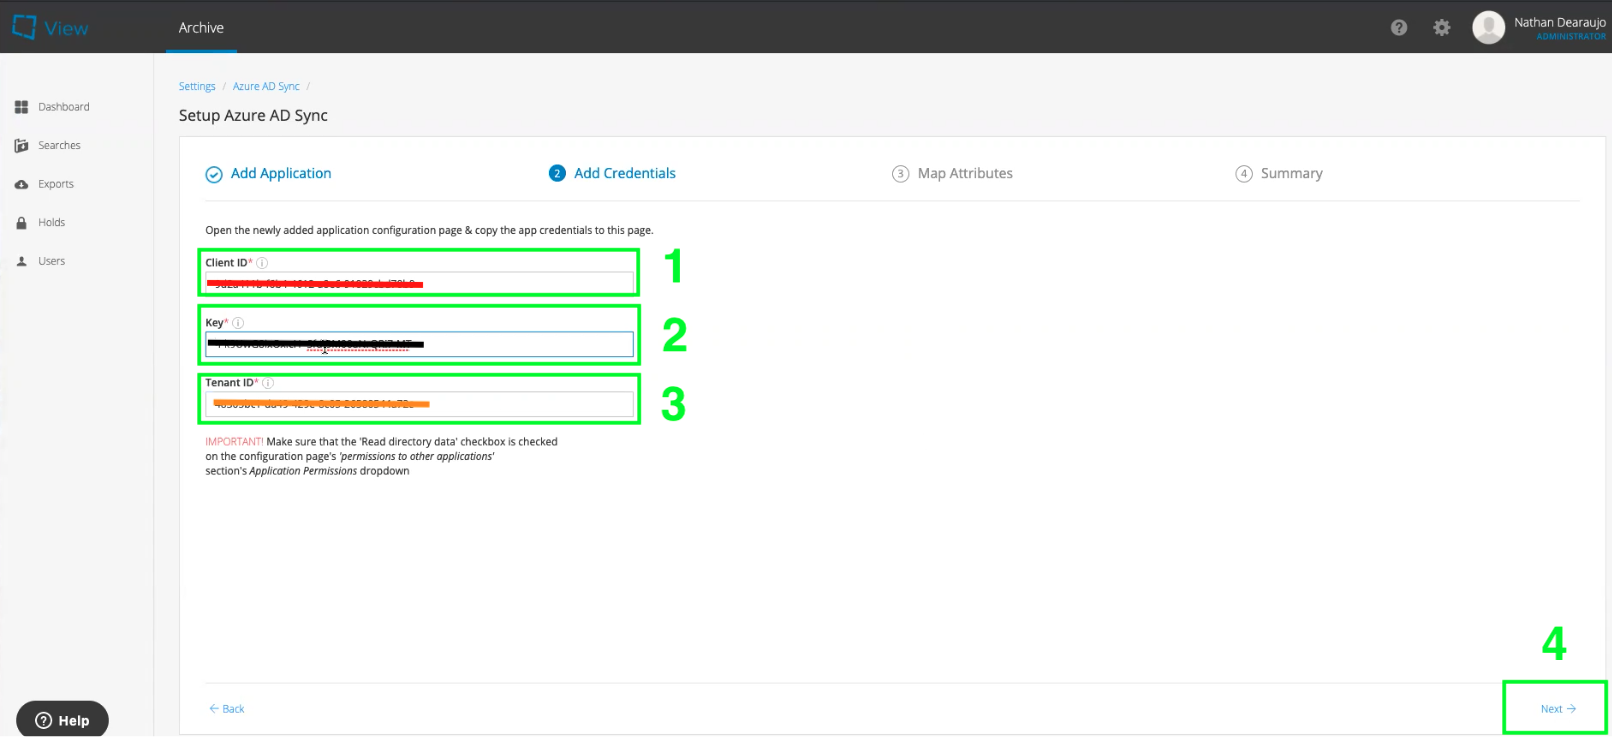
5. Add values to 'Add Credentials' on the View AD sync workflow
5-1 paste client ID
5-2 paste key value
5-3 paste tenet ID
5-4 select 'next'
5-5 Map Attributes section > select 'next'
5-6 Summary section > select 'Finish Setup'
Comments
0 comments
Please sign in to leave a comment.